Learn How to Test HVAC Capacitors with a Multimeter Today
Testing HVAC capacitors ensures your system runs efficiently. Faulty capacitors can disrupt the performance of your HVAC unit, leading to higher energy bills and reduced comfort. A multimeter helps you diagnose capacitor issues quickly and accurately. Regular testing prevents damage to critical components like the control board, saving you from costly repairs and downtime. Knowing how to check a condenser with a multimeter also helps you identify problems early. By maintaining your capacitors, you extend the lifespan of your HVAC system and avoid unexpected breakdowns.
Key Takeaways
Checking HVAC capacitors is important for keeping systems working well. Regular checks help avoid expensive repairs.
Use a multimeter with a capacitance setting to test capacitors. This tool helps find problems easily.
Always stay safe by turning off power and discharging capacitors first. This stops electrical shocks.
Find out what type of capacitor your HVAC system uses. Check the manual to see if it’s a start, run, or dual capacitor.
Match the multimeter reading to the capacitor’s rated value. Good readings should be within ±6% of the listed number.
Watch for signs of bad capacitors, like strange noises or higher energy bills. Fixing problems early saves money.
If a capacitor fails, test it again to be sure before replacing it. Pick a new one with the same specifications.
Call a professional if you’re unsure about testing or replacing capacitors. Safety and proper setup are very important.
Tools and Safety Precautions for Testing Capacitors
Essential Tools for Testing
To test HVAC capacitors effectively, you need the right tools. These tools ensure accuracy and safety during the process.
Multimeter for capacitance and resistance testing
A multimeter is an essential device for testing capacitors. This handheld tool comes with a dial, two probes, and a digital display. It measures capacitance, which is the capacitor's ability to store an electric charge. You can find multimeters at most home improvement stores, and they are relatively inexpensive. Make sure the one you choose has a capacitance testing feature.
Insulated screwdriver for discharging capacitors
Capacitors can hold a dangerous electrical charge even after the power is off. An insulated screwdriver allows you to discharge this stored energy safely. The insulation protects you from accidental shocks while working.
Needle-nose pliers for safe handling
Needle-nose pliers help you handle small components like capacitor terminals. They provide a firm grip, reducing the risk of slipping or damaging the capacitor during removal or testing.
Safety gloves and goggles for protection
Safety gloves and goggles are non-negotiable when working with electrical components. Gloves shield your hands from electrical shocks, while goggles protect your eyes from potential sparks or debris.
Safety Precautions to Follow
Testing capacitors involves working with electricity, which can be hazardous. Following safety precautions minimizes risks and ensures a smooth testing process.
Turn off power to the HVAC system
Always turn off the power to the HVAC system before starting. This step prevents accidental shocks and protects the system from further damage.
Verify power is off using a voltage tester
After switching off the power, use a voltage tester to confirm there is no electricity flowing to the system. This double-check ensures your safety.
Discharge the capacitor safely before testing
Capacitors store energy even when the system is off. Use an insulated screwdriver to discharge the capacitor safely. Place the screwdriver across the terminals to release the stored charge.
Avoid direct contact with capacitor terminals
Never touch the capacitor terminals directly, even after discharging. Residual energy might still be present, posing a risk of shock. Handle the capacitor with tools like pliers to stay safe.
Tip: Look for signs of damage, such as bulging or leaking fluid, before testing. Damaged capacitors can be hazardous and should be replaced immediately.
By using the right tools and following these precautions, you can test HVAC capacitors safely and effectively.
How to Test an AC Capacitor with a Multimeter
Locate and Identify the Capacitor
Find the capacitor in the HVAC system
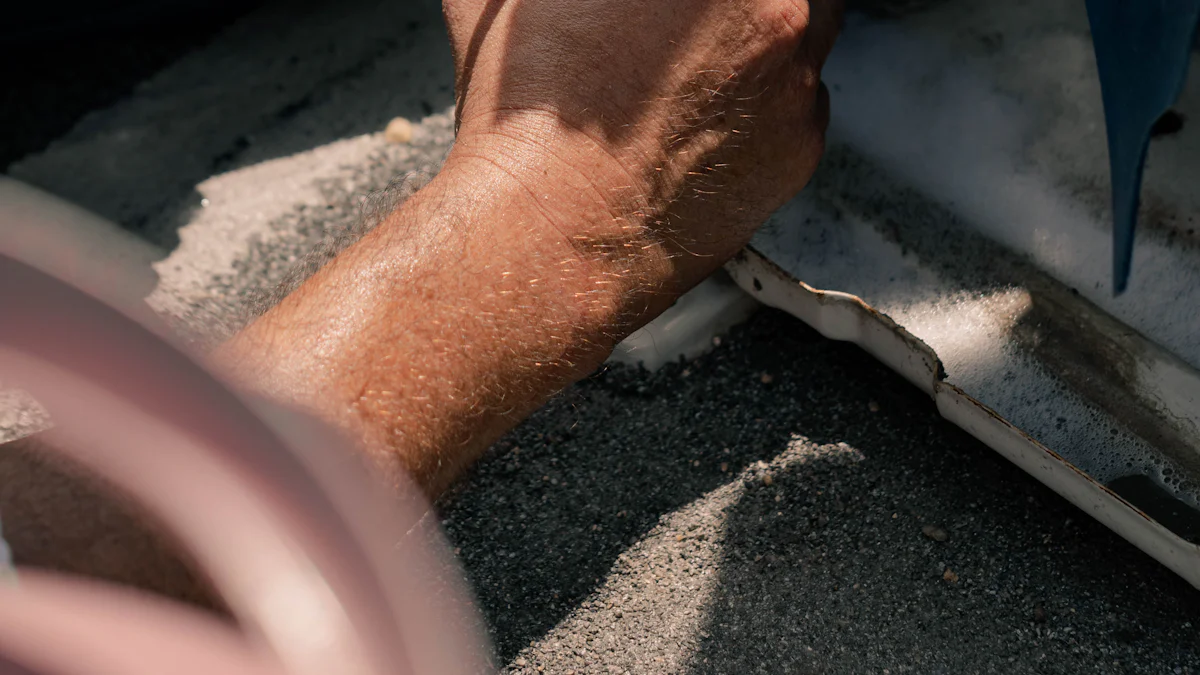
To begin, locate the capacitor in your HVAC system. In central air systems, the capacitor is inside the compressor, which is housed in the outdoor unit. For ductless mini-split systems, it may appear as a small square-shaped or larger cylinder-shaped component, also found outside. In geothermal systems, you will find the capacitor alongside the compressor in the outdoor unit. Identifying the correct component is crucial before proceeding with the test.
Use the system's manual for guidance
Your HVAC system's manual can help you identify the type of capacitor you are dealing with. Capacitors are typically categorized into three types:
Start Capacitors: These provide the initial surge of energy to start the motor.
Run Capacitors: These supply continuous energy to keep the motor running efficiently.
Dual Capacitors: These combine the functions of start and run capacitors into one unit.
Refer to the manual to confirm the capacitor's specifications and ensure you are testing the correct component.
Disconnect and Discharge the Capacitor
Safely discharge stored energy using an insulated screwdriver
Before testing, discharge the capacitor to eliminate any stored energy. This step prevents electrical shocks or injuries. Turn off the power supply to the HVAC system and verify it is off using a voltage tester. Then, use an insulated screwdriver to touch the metal shaft across the capacitor terminals. Repeat this process on all terminals to ensure complete discharge. Alternatively, you can use a bleeder resistor for a controlled discharge or a light bulb to indicate when the capacitor is fully discharged.
Remove the capacitor from the system with pliers
Once discharged, remove the capacitor from the system. Use needle-nose pliers to handle the terminals safely and avoid direct contact. Carefully disconnect the wires attached to the capacitor, noting their positions for reassembly. Place the capacitor on a non-conductive surface to prepare it for testing.
Set Up the Multimeter for Testing
Switch the multimeter to capacitance mode (MFD/μF setting)
Set your multimeter to the capacitance measurement mode, often labeled as MFD or μF. This setting allows you to measure the capacitor's ability to store an electric charge. Ensure the multimeter is not set to resistance or voltage mode, as this could lead to inaccurate readings or damage to the device.
Ensure the multimeter is functioning correctly
Before testing, confirm that your multimeter is working properly. Detach the capacitor from the circuit to avoid interference. Attach the test leads to the capacitor terminals and check the reading. For low capacitance values, use the Relative mode to account for the test leads' capacitance. Avoid common errors like misinterpreting polarity or using a damaged multimeter, as these can affect the accuracy of your results.
By following this step-by-step process, you can safely and effectively test AC capacitors. Proper preparation ensures accurate readings and helps you diagnose issues with confidence.
How to Check a Condenser with a Multimeter
Connect the multimeter probes to the capacitor terminals
To test the condenser, you need to connect the multimeter probes to the capacitor terminals correctly. Follow these steps to ensure accurate results:
Turn off all power to the HVAC system. Confirm the power is off using a voltage tester.
Fully discharge the capacitor using an insulated screwdriver.
Remove the capacitor from its circuit carefully. Use needle-nose pliers to handle the terminals.
Set your multimeter to the capacitance measurement mode (MFD/μF).
Attach the red probe to the positive terminal and the black probe to the negative terminal of the capacitor.
Observe the reading displayed on the multimeter.
Write down the capacitance value for comparison.
Check for short circuits by switching the multimeter to the continuity setting and connecting the probes to the terminals.
Always inspect the capacitor visually for signs of damage, such as bulging or leaking fluid. Damaged capacitors should not be tested further and must be replaced immediately.
Record the capacitance reading displayed on the multimeter
Once the probes are connected, the multimeter will display the capacitance value in microfarads (µF). Write this number down for reference. This reading represents the capacitor's ability to store an electric charge. If the multimeter shows no reading or displays "OL" (overload), the capacitor may be faulty.
Interpret the Results of the Test
Compare the reading to the capacitor's rated capacitance
Every capacitor has a rated capacitance value printed on its casing. Compare the reading from your multimeter to this value. The acceptable range is typically within ±6% of the rated capacitance. For example, if the capacitor is rated at 50 µF, the acceptable range would be between 47 µF and 53 µF.
Here’s a quick reference table for typical HVAC capacitor ranges:
Capacitor Type | |
|---|---|
Start Capacitor | 25 µF to 1,400 µF |
Run Capacitor | 2 µF to 80 µF |
If your reading falls outside the acceptable range, the capacitor may not function properly.
Determine if the capacitor is within the acceptable range
If the capacitance reading is within the acceptable range, the capacitor is likely in good condition. However, if the reading is significantly lower or higher than the rated value, the capacitor may be failing. A reading of "OL" or zero indicates a completely faulty capacitor. In such cases, you should replace the capacitor immediately to restore your HVAC system's performance.
Knowing how to check a condenser with a multimeter helps you identify issues early. Regular testing ensures your capacitors remain in optimal condition, preventing costly repairs and system downtime.
Troubleshooting and Results for Faulty Capacitors
Signs of a Faulty Capacitor
Faulty capacitors can cause various issues in your HVAC system. Recognizing these signs early helps you address problems before they escalate.
A humming noise comes from the outdoor unit.
Monthly energy bills increase unexpectedly.
The AC unit shuts down without warning.
The system refuses to turn on.
A burning smell emanates from the outdoor unit.
The air conditioner is older and nearing the end of its lifespan.
You may also notice frequent system cycling, weak airflow, or inconsistent temperature control. Audible humming or clicking sounds often indicate the capacitor struggles to maintain a charge.
Tip: Look for visible indications of a bad capacitor, such as swelling, leaking, or bulging. Swelling suggests internal failure, while leaking fluid points to a compromised casing. Bulging often results from excessive heat buildup.
Common Causes of Capacitor Failure
Understanding what leads to capacitor failure can help you prevent future issues.
Overheating due to high temperatures
Capacitors are sensitive to heat. High temperatures can cause solder joints to fail and alter the capacitor's characteristics. This overheating often results in permanent damage.
Electrical surges or power fluctuations
Power surges damage the delicate internal components of capacitors. Voltage fluctuations, especially during storms or in areas with unstable power grids, accelerate degradation and lead to failure.
Natural wear and tear over time
Capacitors have a limited lifespan. Over time, their ability to store and release energy diminishes. This natural wear and tear eventually causes them to fail.
Environmental Factor | Effect on Capacitors |
|---|---|
Temperature | Causes solder joint failure and changes capacitor characteristics. |
Humidity | Leads to corrosion of terminals and connections. |
Chemical Exposure | Results in short circuits and reduced capacitance. |
Barometric Pressure | Affects performance in high-altitude environments. |
What to Do if the Capacitor Fails the Test
If your test reveals a bad AC capacitor, take the following steps:
Confirm the diagnosis with a second test
Repeat the test to ensure accuracy. Use the multimeter again to verify the capacitance reading. A multimeter reading of "OL" indicates an open circuit, meaning no current flows through the capacitor due to internal breakdowns.
Prepare to replace the faulty capacitor
Once you confirm the capacitor is faulty, prepare for replacement. Ensure you have the technical expertise to handle HVAC components safely. If you're unsure how to tell if the capacitor is bad or lack experience, consider hiring a professional. Handling electrical components without proper precautions can be dangerous. Additionally, DIY repairs may void the manufacturer's warranty.
Replacing a bad AC capacitor promptly restores your HVAC system's performance and prevents further damage. Addressing the symptoms of a bad capacitor early ensures your system operates efficiently and avoids costly repairs.
How to Replace a Faulty AC Capacitor
Choosing the Right Replacement Capacitor
Match the capacitance and voltage ratings
When replacing a faulty capacitor, you must select one with the correct specifications. Check the capacitance (measured in microfarads, µF) and voltage ratings printed on the old capacitor. Always match these ratings exactly. Using a capacitor with mismatched ratings can cause control loop instability, which may lead to performance issues in your HVAC system. For voltage, choose a replacement with a rating equal to or greater than the original to ensure safe operation.
Purchase from a trusted supplier
Buy your replacement capacitor from a reputable supplier to guarantee quality. Look for capacitors that meet industry standards, such as Tecumseh H-115 or IEC-60252-1, to ensure reliability. High-quality capacitors are designed with durable materials and undergo rigorous manufacturing processes, which help them last longer and perform better. Avoid low-cost alternatives that may compromise your HVAC system's efficiency.
Installing the New Capacitor
Securely connect the new capacitor to the system
Before installation, test the new capacitor with a multimeter to confirm it works correctly. Label each wire on the old capacitor before disconnecting it to avoid confusion during reconnection. Use the correct gauge and type of wire to ensure efficient operation and prevent overheating. Once the wires are labeled, connect them securely to the terminals of the new capacitor. Double-check that each wire is attached to the correct terminal to avoid electrical issues.
Double-check all connections before restoring power
After connecting the wires, inspect all connections to ensure they are tight and secure. Loose connections can lead to poor performance or even damage the capacitor. Verify that the capacitor is mounted properly and that no wires are exposed. Once everything is in place, you can proceed to restore power to the HVAC system.
Test AC Capacitor After Replacement
Turn the HVAC system back on
After installing the new capacitor, turn the power back on to your HVAC system. Observe the system as it starts up to ensure it operates smoothly.
Monitor the system to ensure proper functionality
Pay close attention to the system's performance. Check if the air conditioner blows cold air and operates without unusual noises or interruptions. If the system functions as expected, the replacement was successful. If issues persist, retest the capacitor using a multimeter to confirm it is working correctly. Follow these steps to test the capacitor:
Locate the capacitor in the system.
Disconnect it safely.
Set your multimeter to capacitance mode.
Test the capacitor by connecting the probes to its terminals.
Check for continuity to ensure proper electrical flow.
Interpret the results to verify the capacitor's functionality.
Knowing how to replace an air conditioner capacitor ensures your HVAC system runs efficiently. By following these steps, you can restore your system's performance and avoid costly repairs.
Regularly testing HVAC capacitors is essential for maintaining system efficiency and avoiding costly repairs. By identifying issues early, you protect critical components like the compressor and fan motor from damage. Neglecting capacitor problems can lead to overheating, increased energy bills, and even system failure.
Always prioritize safety when working with electrical components. Turn off the power, discharge the capacitor, and use proper tools to minimize risks. If you feel unsure about any step, consulting a professional ensures the job is done correctly. Professionals have the expertise to replace capacitors safely and identify underlying issues that may cause future failures.
Taking proactive steps to maintain your HVAC system offers long-term benefits. These include cost savings, increased system longevity, and peace of mind during power surges. For additional guidance, explore resources like HVAC maintenance guides and seasonal checklists to keep your system running smoothly year-round.
Tip: Address capacitor issues promptly to maintain energy efficiency and ensure comfort and safety for your household.
FAQ
1. What does an HVAC capacitor do?
An HVAC capacitor stores and releases energy to power the system's motors. It provides the initial boost needed to start the compressor and fan motors and ensures they run efficiently. Without a functioning capacitor, your HVAC system may fail to start or operate properly.
2. How often should you test HVAC capacitors?
You should test HVAC capacitors at least once a year during routine maintenance. Regular testing helps identify potential issues early, ensuring your system operates efficiently and preventing unexpected breakdowns.
3. What happens if you don’t discharge a capacitor before testing?
Failing to discharge a capacitor can result in electrical shocks or damage to your multimeter. Capacitors store energy even when the system is off, so discharging them ensures your safety and protects your tools.
Tip: Always use an insulated screwdriver to discharge the capacitor safely.
4. Can you test a capacitor without removing it from the system?
No, you must remove the capacitor from the circuit to test it accurately. Testing it while connected can lead to interference from other components, resulting in incorrect readings.
5. What does “OL” mean on a multimeter when testing a capacitor?
“OL” stands for "overload" and indicates the capacitor is open or faulty. This means no current flows through the capacitor, and it needs replacement.
6. How do you know if a capacitor is bad without a multimeter?
Look for visible signs like bulging, leaking fluid, or a burnt smell. You may also notice your HVAC system struggles to start, makes unusual noises, or fails to cool effectively.
7. Can you replace an HVAC capacitor yourself?
Yes, but only if you have the proper tools and knowledge. Always follow safety precautions, such as turning off the power and discharging the capacitor. If unsure, consult a professional to avoid risks.
8. What is the lifespan of an HVAC capacitor?
Most HVAC capacitors last 10-20 years, depending on usage and environmental factors. Regular maintenance and testing can help extend their lifespan and ensure optimal performance.
Note: Extreme heat, power surges, and wear and tear can shorten a capacitor’s life.
See Also
Testing Starters: A Guide for Vehicles and Equipment
Exploring Various Capacitor Types and Their Unique Functions
Step-by-Step Guide to Testing Zener Diodes Easily
